Disney Cruise Fun – Postcard Recipe Exchange

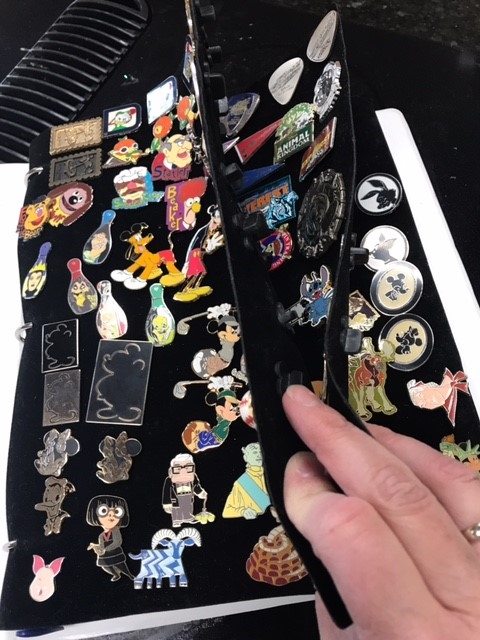
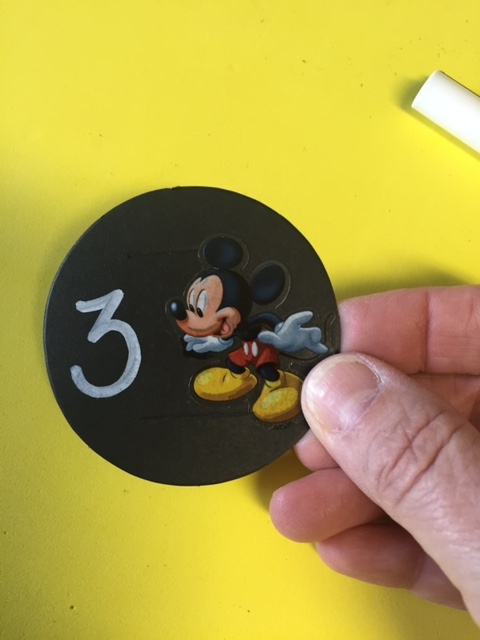
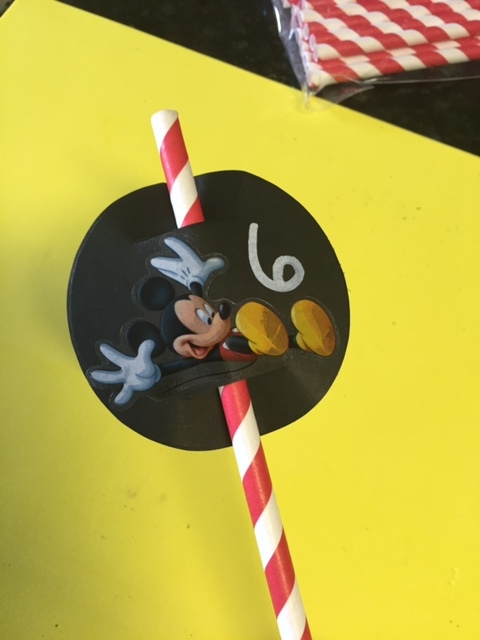
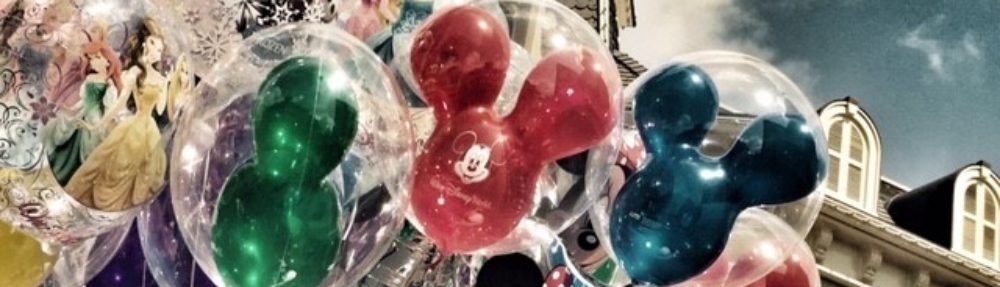
You may have heard of Fish Extenders and those unofficial, Secret-Santa-like gift exchanges happening on Disney Cruises everywhere.  Our family has enjoyed joining Fish Extender groups in the past and plan to participate again some day.  On our upcoming trip, I decided to join an exchange group that requires a lot less preparation and barely takes up any room in my suitcase.

Disney Cruise Fun – Postcard Recipe Exchange

You can search Facebook and find at least one cruise group to join for your sailing.  I found a great group this time with an excellent moderator who goes above and beyond to get members involved and excited about our cruise.  The moderator(s) usually organize some group events and meet-ups for the trip and also create exchange groups for interested parties.

I indicated early on that I’d love to be part of a postcard recipe exchange.  This involves getting some local postcards, adding a recipe to the back and keeping up with a list of cabin numbers to which to distribute these during our cruise.  In return, I’ll get about 11 new recipes to try and see postcards from all over.  Fun, but also very simple.  My kind of thing!

Here’s what I’m giving out…

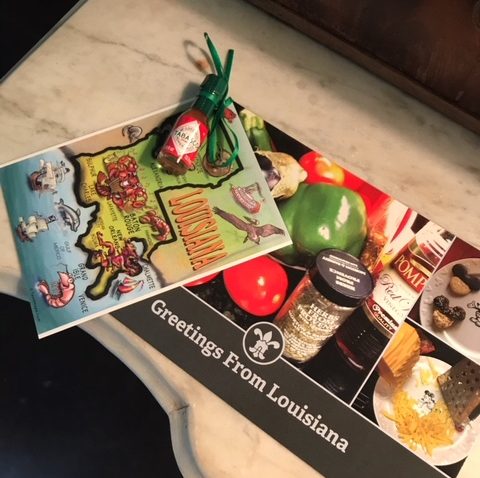
I had some leftover postcards (from a previous cruise).  I ordered them with my own pictures on the front and one of my all-time favorite recipes – Maui Potatoes (served long ago at ‘Ohana in Disney’s Polynesian Village Resort) – printed on the back.  This time I wanted to add a bit more Louisiana flair to my exchange offering.  I found some small, but extra-adorable Louisiana postcards to go with the recipe ones (ordered from Zazzle).  I punched holes in the corners of the cards so I could tie them together with green ribbon.

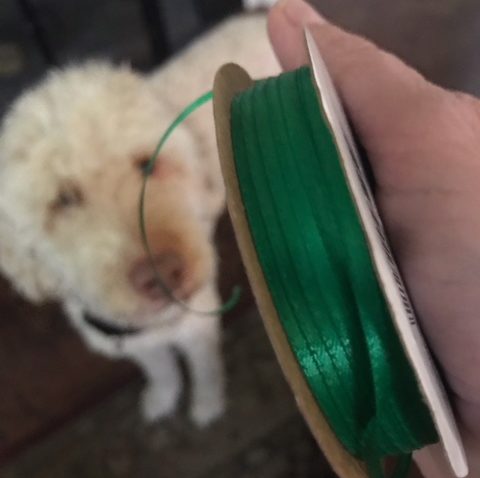
To the ribbon, I also tied a tiny bottle of Tabasco sauce.  Am I advocating adding hot sauce to Maui Potatoes?  No, I’m advocating adding hot sauce to everything! Seriously, it’s what we do here in Louisiana.  Eggs, pizza, pasta, salad, sandwiches, gumbo, jambalaya, soups, stews…just about everything tastes better with a dash or three of Tabasco!  
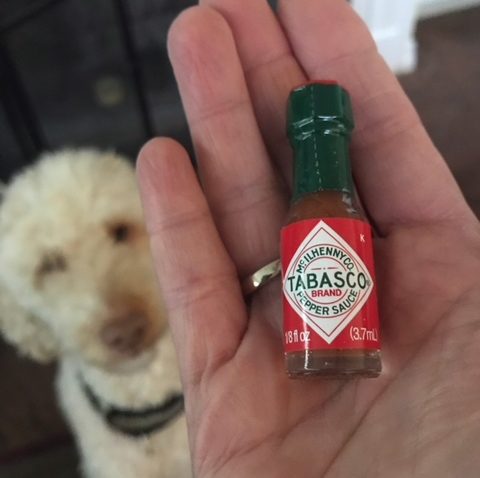
We go through a big bottle every couple of months.  Want to really experience a taste of Louisiana?  Grab your own bottle and get to sprinkling that tangy, peppery, spicy deliciousness on your favorite dishes.

If you’re going on a Disney cruise, I highly recommend joining an exchange group.  If you’re coming to Louisiana, I highly recommend a visit to Avery Island (an easy drive south from Lafayette) to see firsthand how Tabasco is produced.  You won’t be disappointed!


Disney DIY – Minnie Spring Wreath

Disney DIY - Minnie Spring Wreath
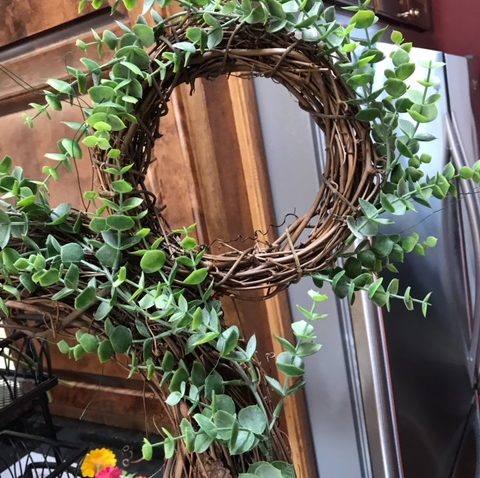
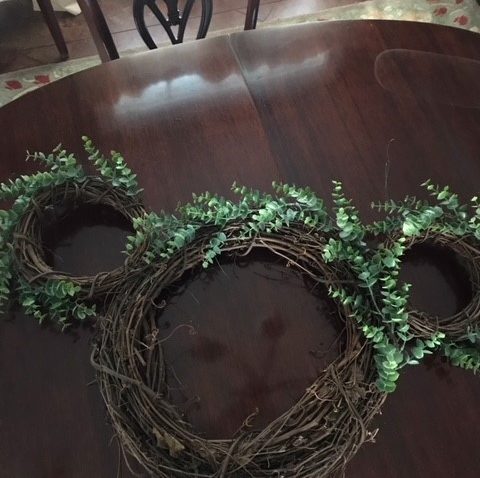
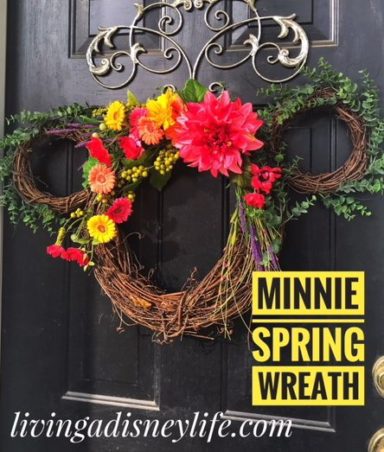
As so often happens, creativity struck when I noticed a 50%-off sale at my favorite hobby store.  This time for artificial flowers.  There was a huge selection and I wanted to be frugal, but have a nice finished project.  I’m positive I invested more time shopping for flowers than I did putting the wreath together.  I seriously spent very little money and hardly any time on the entire endeavor.  You know I’m lazy when it comes to stuff like this.  I strive for maximum results from minimum effort (a challenge I can’t resist).  So, if you decide to take on this project, your results could be much better than mine.  As it is, I’m pretty pleased with the payoff my modest time/money investment produced.Disney DIY - Minnie Spring Wreath

Disney DIY – Minnie Spring Wreath

What You’ll Need

  • Three grapevine wreaths (one large, two small)
  • Wire
  • Flowers (put together a bouquet of colors you love)
  • Greenery

I know there’s an official ears-to-head ratio for Mickey and Minnie (ears are 3/5th the size of the head).  The two smaller wreaths I bought were too small to be officially correct to that ratio and I knew this going in.  Two factors were at play: the wreath selection was limited and the end product needed to actually fit on my front door.  To compensate for this problem, I plumped up the ears with the addition of some greenery and was happy with how it turned out.  Do the best with what you’ve got!

So Easy, Anyone Can Do It!

I started by pre-cutting several lengths of wire.  Then I added greenery to the ears and head.  On the ears, I was careful to keep the greenery to the outside, top edges in order to add volume and make them look larger.  I did this before wiring the ears onto the head, which was super easy.  This part took about 10 minutes.  
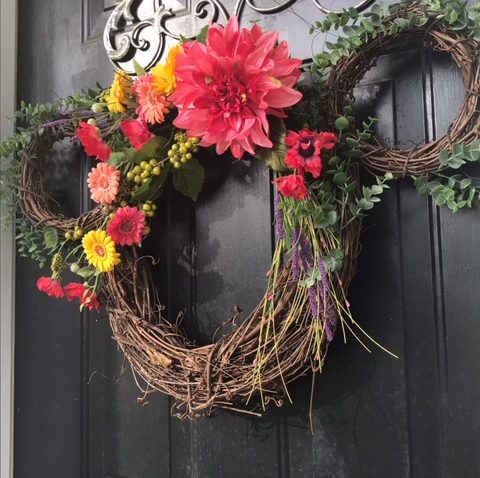
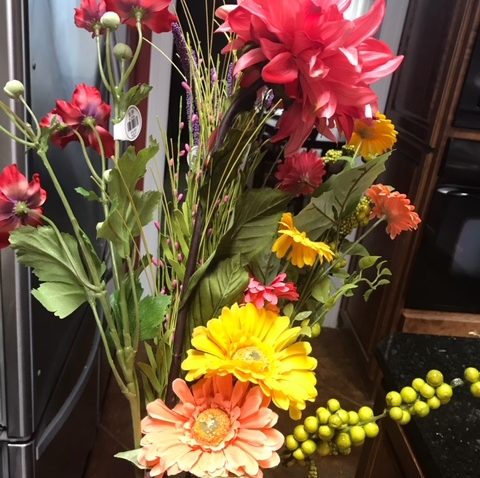
Next, I started wiring flowers onto Minnie’s head.  I started with the biggest clusters of flowers, added the one giant pink flower, then finally filled in with accent sprays and smaller flowers.  Disney DIY - Minnie Spring Wreath
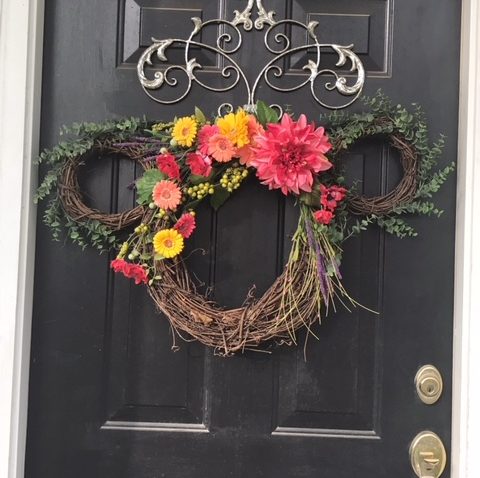
That’s it.  Took maybe 30 minutes, max.  You could easily make this fancier with the addition of some ribbon, flowers in hidden Mickey shapes, or maybe even a small bird’s next with eggs in it.  What do you think?  Is this something you’d try?  I did a Christmas version here and a Halloween wreath here.

Have you completed a spring Disney project?  I’d love to see it!

DIY Disney Christmas Ornaments From Pins

It’s been a while since I’ve had time to be crafty, but an idea popped into my head a while back and it wouldn’t go away.  Creative thoughts flowing, I formulated a plan that was, of course, both easy and cheap.  ‘Cause you know, with DIY stuff, that’s how I roll.

DIY Disney Christmas Ornaments From Pins

It started a few weeks ago when I found, tucked away, yet another bag of Disney pins purchased on a trip to Disney World some time ago.  As I was stuffing lovingly adding these rediscovered treasures into our “Disney pin drawer”, I thought it was a terrible shame that we keep our pin collection tucked away.  Couldn’t I find a way to display at least a few favorites somehow?  What better place than on our Disney Christmas tree!

I’ve got mad skills with a hot glue gun and I’m a ribbon hoarder.  I’m also cheap.  Starting there, I purchased two additional items and I was ready to go!  You artistic types that like to measure stuff will love this project.  I didn’t measure anything and I’m not all that artistic and I made some pretty cute ornaments.  Joseph took one look at them and called them banners, so we’ll go with that.  Let’s make some Disney pin banners!

Here’s what you’ll need:

  • Disney pins and/or buttons
  • Ribbon in different colors and widths
  • Wooden sticks either plain or painted
  • Wire (I found colored wire at my local discount store)
  • Extras like buttons or flowers for embellishments

Here’s what you do:

Choose pins and ribbon that will compliment each other.  I selected pins based on the ribbon colors I already had.  You could pick out your favorite pins and buy ribbon to match, but then you wouldn’t have the fun of using leftover ribbon in an awesome way.  I bought a pack of sticks and spray-painted them silver because…yep, you guessed it, that’s the color paint I found in my laundry room cabinet.  You don’t have to paint the sticks at all if you don’t want to.  I punched holes in an empty k-cup box, stood the sticks up in the holes, sprayed them, waited for the paint to dry, turned them over and painted them again.

Combine ribbons anyway you want to or not at all.  For some pins, I hot-glued ribbons together side-by-side to make them wider.  For others I glued layers of ribbons together to make a more interesting background.  (If it looks like there’s hot glue everywhere in these pictures it’s only because there was!)  Fold the ribbon over, hot-glue it to the stick and pin on the pin – the beauty of this project is that the pin comes right back off if you want to do something else with it in the future.  I added some buttons to Mickey’s banner and a rose to Mulan’s for fun, but that’s only because I already had that stuff.

Finally, add something to hang the banner up with.  I used inexpensive colored wire and I just wrapped the wire around the ends of the stick and added a little twist at the top to hold the ornament hook.  Tah-Dah!!!  Easy-peasy!  If you have kids, this might be a fun project while they’re out of school for the holidays.

Thanks for stopping by!  If you decide to make this project or a variation thereof, please share pictures here or over on Facebook.  I’d love to see what you make!


Lazy Person’s Disney Countdown Calendar

When my vacation countdown’s in the home stretch, I want a countdown calendar that’s more exciting than a number on a smartphone app. I may not have little ones at home anymore, but that doesn’t mean I don’t want a cute way to note the passing of one less day between me and my Disney World vacation! Being a tad lazy, I’ve found a way to mark my countdown to Disney that takes little effort and results in my own ridiculous happiness.  I’ll share my secret with you now for my…

Lazy Person’s Disney Countdown Calendar

You can do this on the cheap or fancy it up a bit – your choice.  I’ve done it both ways, so I can show you how to do it low-budget or with a bit more of an investment – either way’s a piece of cake. Make this on your own or as a fun craft project with your kiddos.

Let’s get started. Here’s what you’ll need:disney-countdown-calendar-supplies

  • Straws
  • Paper Circles (can be made from construction paper, craft foam or pre-purchased “straw toppers”)
  • Stickers or Leftover Scrapbooking Decorations
  • Chalk pens or magic markers

Fancy Version:

Take an straw topper, add a Disney sticker, add a number (if you want to) for the countdown with a chalk pen.  disney-countdown-straw-topperKeep going until you have your countdown complete and TA-DAH!!! Boom BABY!  Store those straws in a cute holder and use one each day until it’s time to GO!disney-countdown-calendar-straw

Budget-Friendly Version:disneycountdown-homemade-straw-toppers

No need to break the bank on fancy straws and toppers – especially if you have a couple-few (as we say in these parts) kids that will each want their own collection of countdown straws.  Just buy those cheap economical straws at the grocery store and use some leftover craft foam (like I did – mine was left over from making Stateroom Door Décor) or construction paper even.  disney-countdown-calendar-tutorialMake your own straw toppers by cutting foam or paper into circles (trace around a juice glass) then cut slits at the top and bottom of each circle.  Decorate as desired and there you go!disney-countdown-calendar-easy

I’m enjoying milk and cookies as I count down the days until my next Disney vacation!

What’s your favorite way to count down to Disney?