Disney Cruise Ports – Zip-lining in Skagway, Alaska

DSCN1625


Magical Memory Monday – Skagway! Alaskan Cruise 2011

I can’t say enough about how much we enjoyed our opportunity to visit and learn about the great state of Alaska aboard the Disney Wonder.  Skagway was the second of four ports on our cruise.  Our departure was from Vancouver (loved!) before the ship visited Skagway, Juneau and finally Ketchikan (more on those another time).  We also spent a day aboard ship in Tracy Arm Fjord which is a destination (allows you to see the Sawyer Glacier), but you stay on the ship to enjoy it.  We booked excursions in three ports (Skagway, Juneau, and Ketchikan) through Disney Cruise Line, and while all of the excursions were enjoyable, our favorite by far was our adventure in Skagway.

We like thrills, we like action, and only one of us is afraid of heights – so we thought zip-liningDSCN1879 
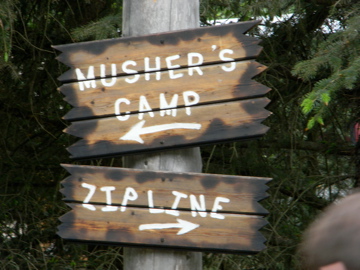
sounded just right for us.   We met with our group on the ship at 8:45 am before heading off on our bus ride which included a short tour of Skagway before taking us to basecamp in Dyea.  The scenery is spectacular and, this may sound weird, but the air is the cleanest, freshest air – more on that in a minute. 

Once we reached the “Musher’s Camp” area, we boarded a Unimog for the upward climb to the zip lines.  A unimog is an open air, all terrain vehicle (Mercedes) that gained its fame during World War II.  Along the way, our driver pointed out the abundant sphagnum moss growing in this scenic rain forest –  he told us that sphagnum DSCN1881
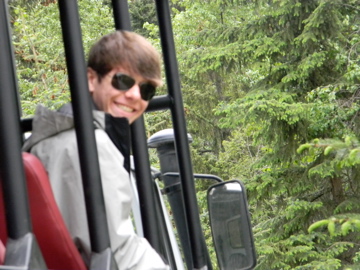
only grows where the air and water are both extremely clean.  So as we rode in the chilly air, we all stuck our faces out into the breeze and took deep breaths of the clean air – heading up, up, up towards our ELEVEN zip lines and four suspension bridges which would take us over glacier fed waterfalls and rapids in the incredible wilderness.  FYI:  The moss is extremely think and spongy on the ground – you can actually bounce on it.  If you ever find yourself standing on moss in the Alaskan rainforest, give it a try.  

First we were given our equipment (harnesses, helmets, and gloves) and received anDSCN1892 
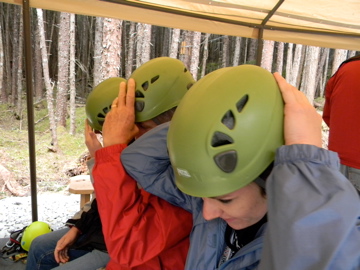
instructional lecture before practicing on the training line.  This line was short and low to the ground – easy.  We were ready!  Our small group consisted of the four of us along with a mother and her tween-ish son (also from our cruise).  Our two guides, young men both with a great sense of humor, were from other parts of the U.S., just summering in Alaska to work as zip line guides (we thought that sounded like a lot of fun).

The longest line was about 750 feet, but all the lines were a LOT of fun.  Megan is a tiny bit afraid of heights so we thought we might have to, well, ummm….shove her off the platform when her turn DSCN1917came, but she surprised us all with her bravery!  We all had a fantastic time and would do this excursion again in a heartbeat.           

Mammoth Waterfalls & Ultra Zip Line Adventure – was the name of the Disney Cruise Line excursion when we were in Skagway.  I see the name has been changed to Grizzly Falls Ziplining Expedition.  It is listed on the cruise line’s current excursion menu at $169 per person.  If you are booked on an Alaskan cruise, I highly recommend this activity IF you’re traveling without children or if your children are at least 10 years old.

Have you ever cruised or thought about cruising in Alaska?  I’d love to hear about it!

First Disney Cruise? This One’s for YOU – Door Décor!

IMG_0605If you are preparing to set sail on your first Disney Cruise, there are two things you need to know about:  Door Décor and Fish Extenders.  Once you know about them, your participation is purely optional, but they’re both a great way to add a little extra fun to your Disney Cruise experience.

Today I’ll cover Door Décor – come back tomorrow for the rest!

Door Décor – I highly recommend this.  Super easy and extremely beneficial!  All you really need to do is bring along a couple of Disney magnets to slap on your stateroom door.  G’head, ask….what?  WHY!?!

Two reasons, #1:  Yeah, think about it, all those doors look just alike…hundreds of them!  Customizing your stateroom entrance for the duration of your stay makes it ever so much easier for kiddos and adults alike to stop in the right place along that looooooong corridor (no need to try so hard to memorize that cabin number!).

Reason #2:  This is a fun and creative way to show your love for Disney with a minimum investment.  I make my decorations at home by buying some Disney scrapbooking supplies – some things I arrange on colored paper before I put some magnets on the back (buy a self-sticking roll of magnetic “tape” and cut it as you need it).  Some things are great just as they are, just slap a piece of magnet on the back and VOILA!  Custom Disney Door Décor.  Be as simple or as fancy as you like, but really, you’re going to feel sad (guilty even) when you see all those cool doors aIMG_2059nd yours is blank.  Note:  magnets are the only way to go as Disney Cruise Line will not allow you to use tape on the doors.

On our last Disney cruise, I made a new decoration for each cruise port and changed them out as we sailed along.  I’m an amature when it comes to door decorating – some people have the most amazing, personalized, laminated, professionally crafted stuff on those doors!  Don’t be intimidated!!!  Do as much or as little as you care to do – just do it.  Because I said so.  And also because when your kids are running down the corridor and always know which door is yours, you’ll thank me.

Link to Fish Extender Information

Off the Beaten Path – Disney World Photo Ops

IMG_2021We all want to have Disney World vacation photos taken in front of Magic Kingdom’s Cinderella Castle, Epcot’s Spaceship Earth, Animal Kingdom’s Tree of Life, and Disney’s Hollywood Studios’ Sorcerer’s Hat (maybe).  Those are the quintessential pictures we treasure, of course, and that’s where the Disney Photo Pass photographers are located/easiest to find.  What I want to talk about today is this:  Where else around the World can we snap some photos that’ll make awesome, if a little less iconic, treasures?

When I’m looking at our vacation pics*, I find I really love these off the beaten path, lesser known photo-ops and the funny (some are hilarious) moments captured there.

If you’re planning to go to Disney World, here are some different photo locations you might consider:

IMG_2027IMG_2011

The Beanstalk! (Magic Kingdom’s Fantasy Land) and The Snowman (Disney’s Hollywood Studios)


IMG_2009IMG_3097

Tiki Man (gift shop at the Polynesian Resort), Toy Soldier (Pixar Place, Studios)

IMG_2012

The Great White Shark (Living Seas, Epcot)…give that guy a toothpick!

IMG_2013

I found Nemo! – Also at Epcot’s Living Seas (just steps away from the seagulls that yell “MINE!”)

IMG_2010

I don’t know if it’s still there, but some custodial-type cast members joined in the fun with us at this giant Coca-Cola bottle (in the Studios, if I’m not mistaken).

*Just a note about the picture quality – these are, for the most part, pictures of pictures due to the tragic and unfortunate loss of digital copies our home suffered in the “great computer crash of 2011”.  Sorry they’re not better this time.

If you’ve been to Disney World before, I invite you to look back over some of your most beloved photos from all around the parks – what locations (aside from the big four) were your favorites?

Disney Trip Planning – Granola Crumbs in My Suitcase

2013 iphoneIf there’s one thing our family agrees on, it’s how we spend our time on a Disney vacation and it’s not sleeping!  We hit the parks early – I’m talking get there before they open and be ready to make the most of the day.  There’s a reason our vacation motto is “We’ll rest when we’re dead.”.  Honestly, once the kids stopped needing naps, it became common for us to leave our resort at dawn and drag back in 15+ hours later.

I’m not going to lie – getting everyone up and out the door super early is challenging – and gets harder over the course of a week-long trip.  I have discovered one simple trick that helps a bunch.  It’s this:  Have a portable breakfast ready to go every day!  For us, this means that we pack granola bars and Pop Tarts – but if you need honey buns and mini doughnuts, no problem, those’ll work the same for this purpose.  Just fyi….if you take the Pop Tarts out of the boxes, they’re easier to pack but you cannot tell what kind they are.  I have actually gotten to expert level in detecting Pop Tart flavors strictly by feeling them in their shiny silver packages – a necessity when one child eats only strawberry frosted and the other only chocolate fudge.  But I digress…

DWR2009 033

Waiting for the Bus, Breakfast in Hand

Here’s how it goes:  Mickey wake-up call comes in, everyone’s up, washed and dressed.  Then we check to make sure we each have the necessities (keys-to-the-world, lanyard, breakfast foods, pins for trading, camera, etc.) and we are out the door, headed for the bus or monorail stop.  Seldom does our ride show up immediately when we get there, thus allowing time to consume our portable breakfasts, dispose of the wrappers, and get ready to board.  By no means am I suggesting that mere breakfast-bar-type items keep our tummies happy until lunch, but it gets us to the park in time (with no hungry whining) to catch a couple of our favorite attractions before they get too crowded and that’s the whole idea!

What’s your strategy for getting a jump on the day at your favorite Disney park?