Christmas With a Hint of Disney

I’m getting a late start with Christmas decorating this year.  I’m not complaining, just stating a fact.  Raymond and I spent our first Thanksgiving without our offspring in Franklin, Tennessee with my family.  I missed the kids, sure, but I made the most of the completely amazing shopping opportunities to be found in this fantastically historic town south of Nashville.  While I was buying Christmas presents, I had two other things on my mind – Disney (it’s always on my mind) and holiday decorating.Christmas-Framed-Picture-Project
At my house, not everything has to be officially Disney to be Disney-esque to me.  Sometimes I like just a sprinkle of pixie dust, the mere hint of Disney will do.  While I was shopping for the people on my Christmas list, I came upon a couple of treasures – I was just checking out when I spied these amazing tiny greeting cards, but the line was so long, I couldn’t give up my place to look closer at what caught my eye.  After checking out I realized the potential of these little gems, but had to leave without them due to time constraints.  I couldn’t stop thinking about them and ended up making time to go back to get them the next day.Christmas-Frog-Prince
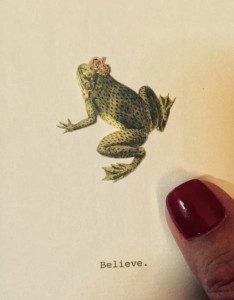
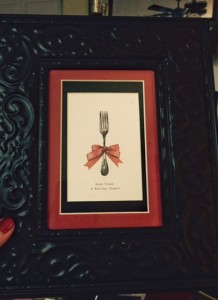
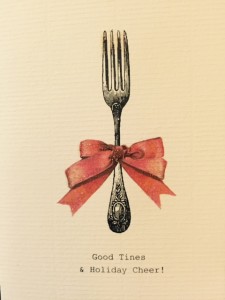
Greeting cards, they were, but subtle, adorable, and very well-done – not your run of the mill cards.  Two of them had that Disney-ish charm.  They were prints of a frog prince and a fork.  The first reminding me of Tiana and her Prince Naveen in The Princess and the Frog.  The second reminiscent of Beauty and the Beast’s Be Our Guest song – “No one’s gloomy or complaining while the flatware’s entertaining!” I had big plans for these small pictures!Christmas-Flatware-Picture-Project
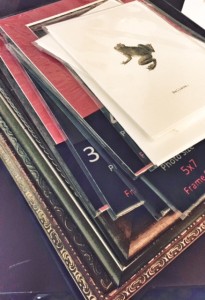
Today at lunchtime, I struck out for my favorite craft store – boy oh, boy, was that place crowded!  I headed straight for the framing section to pick up some mats to make the little cards look more like pieces of art.  Then I made my way to the picture frames where, JOY! Everything was half-off.  After spending more time in line than I did shopping, I was out the door.Christmas-Framed-Picture-Project-Mat
As soon as supper was over, I put together my little works of art and officially have my first Christmas decorations of the year on display!  Cute, no?Christmas-Frog-Prince-Framed Christmas-Flatware-Framed-Picture
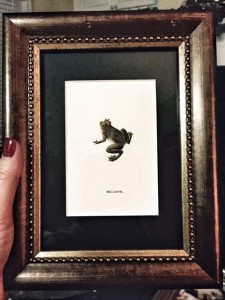
The cards by TokyoMilk can be found online here.

Have you started decorating?  What kinds of things remind you of Disney?

DIY Disney Christmas Tree Topper

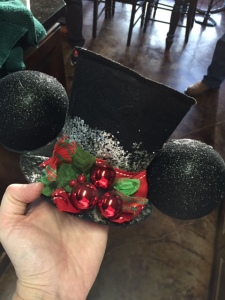
RM-Christmas-Top-HatIt’s been long time since I’ve worked on a Disney craft project.  This one was not even planned, but happened mostly by accident.  Raymond and I were out supporting our local merchants on Small Business Saturday and we happened to be in a fantastic home décor and accessory store that always has the most amazing Christmas decorations!  We were there for just a quick stop to pick up a couple of ornaments for gifts and grab some extra ribbon and deco mesh (you can never have too much deco mesh, right?).

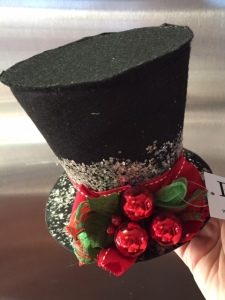
As we were making our way to the checkout counter, I stopped dead in my tracks, having spotted something unexpected and adorable!  I spied a small black felt top hat, decorated festively for the holidays.  As usual, I immediately said what I was thinking, “Hey!  I could put ears on this!” and Raymond, in his usual way, replied, “You could.”  Enough chitchat.  New item added to the armfuls we were carrying, we made for the cash register.

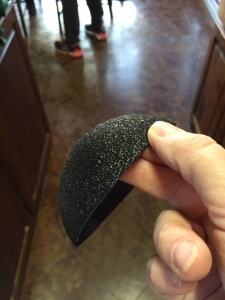
By the time we got home, I had formulated a plan for that little top hat’s transformation into a Disney-themed tree topper.  All I needed was to make use of Raymond’s mad skills with powerRM-Christmas-Ornament-Piece tools.  I handed him a large, sparkly, black shatter-proof ornament left over from the Halloween wreath project and told him to make me a couple of ears from it.  Because I love him, I did remember to yell, “Don’t forget protective eye wear!” as he headed outside to his shop.  I wish I could show and tell you exactly how Raymond managed to slice two perfect ears out of that one ornament, but I didn’t see what he did.  I will tell you it involved something called a die grinder, but I have no idea what that is or does.  If you decide to slice up a plastic ornament, I imagine a saw of some sort would also work.

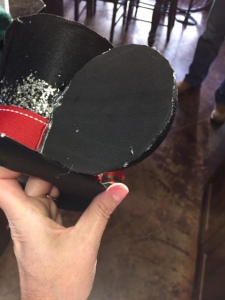
Now, I knew that if I just glued those ears onto the hat, there would be a big gap between each ear, the hat, and the hat’s brim.  I was trying to figure out a way to fill that gap with some black sheet-foam that I had on hand, when Raymond solved the problem for me by cutting the foam into tear-drops that could be used to cover the RM-Christmas-Top-Hat-Ears-Reverseback of each ear and fill in that gap at the same time – I do love that man!  So, I fired up my new glue gun, which gets really super hot in a hurry, and proceeded to glue the backs onto each ear, then glue the ears carefully onto the hat, making sure the corner part of the teardrop filled in the gap between ear, hat, and brim.  I only sustained one glue-burn (on my right pinky), which is actually good – the injury count where hot glue and I are concerned is normally much higher.

So, making the tree topper proved much easier than getting it in a good position at the top of the tree!  I ended up making a spiral wire around the top of the tree to perch the hat securely on, then I used my old tree topper (sprays wired together to mimic Wishes fireworks) to add some festive touches around the hat.  The moral of this story?  Don’t be afraid to try!  When inspiration strikes, go for it.  The hat was $12.99 and for the investment, Raymond’s cutting skills, and one hot glue burn, we got a pretty awesome new Disney decoration for our tree.RM-Christmas-Top-Hat-Finished

Do you have a Disney holiday craft to share?  Let me know and I’ll put your project on our Facebook page!

Oh Disney Tree, Oh Disney Tree

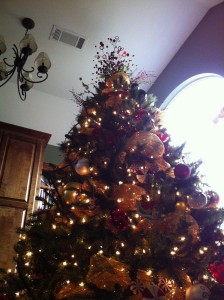
IMG_2292If you’ve been by here for a visit lateley, you’ll have noticed that I’ve been sharing all my tutorials on how to make Disney Christmas decorations. If you missed one, you can find Mickey Ornament how-to’s here and here.  A Mickey door wreath here.  Finally, you can find a Disney painted ornament tutorial here.  The ornaments are all hanging on my Christmas tree, so I thought I’d share a few tips on how I put the whole Disney theme together.

I started with a pre-lit 9-foot tree purchased several years ago – say it with me now- for 50% off at my favorite craft store! Before the ornaments go on, I want the tree to feel Disney-ish, so I start with what I consider foundation or background for the ornaments. I don’t have an official Disney tree-topper (gasp!) so I tried to make the top of the tree represent the “Wishes” fireworks from the Magic Kingdom since Wishes is one of my most favorite things in the world. I used IMG_2236several large Christmas floral sprays in sparkly red and green, adding a couple to the center that had circles that would (hopefully) form Hidden Mickeys when viewed from Copy-of-General-Dis-Pics-11.13-061.jpgdifferent angles. Then, starting at the top, I added yellow/gold deco-mesh – I dislike (hate/loathe-take your pick) deco-mesh and it seems the feeling is mutual. I put it on the entire tree three different times this year and I still think the final look leaves a bit to be desired. Suggestions are welcome. Then on went green and red poinsettias, holly, green and red sparkly floral sprays, and black sparkly dangly-ropey-things (what would you call them?).

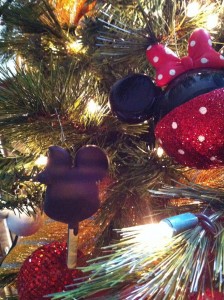
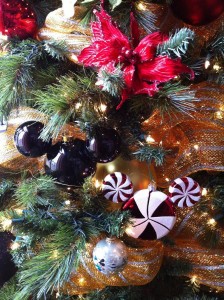
Foundation in place, I was ready for the ornaments. Even before the official (and unofficial) Copy-of-General-Dis-Pics-11.13-061.jpgIMG_2298Disney ornaments went on, I first added large, plain ornaments in Disney colors, tucked back into the tree – so they would fill up the background while keeping the outer branches available for the best ornaments. Then, finally ready for the Disney ornaments, I used the smallest ones at the top and worked my way down – largest mostly on the bottom. Okay – I’ll admit it – I talked Raymond into putting the little ornaments at the top for me. He’s way taller and it kept me from repeating the terrible ladder accident I had last spring. That’s it.  Tah-Dahhhhh.

I’ve surfed the net looking for other Disney trees out there. I know some of you have them, so please PLEASE share your tree pics with me and any DIY Disney decorations you’ve made. I would love to see them and get some new ideas for next year.IMG_2293

DIY Disney – More Mickey Christmas Ornaments

IMG_2040

DIY Mickey Ornaments (Part 2)

In my last post about DIY Disney ornaments, the ornaments were super easy to make and cute as can be, yes?  Let’s do it again today – make more Mickey ornaments, but this time, we’ll go “intermediate” level – I think you’re ready!

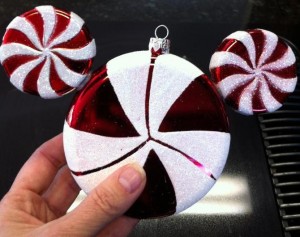
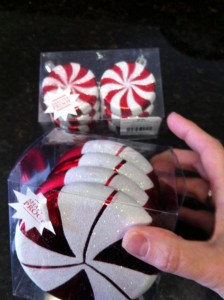
While shopping at my favorite craft store (again, yes, I like it there and yes, Christmas decorations were still 50% off) – I spotted these babies and thought – hey!  With a little help from Raymond and his manly tool-wielding-ways, I can really make some fancy new ornaments.  As luckIMG_2029 would have it, Raymond was with me.  So, I shot him a look (no words required) and he held out his hands to carry the ornament boxes for me.  Gotta love a man that’ll shop and carry at your favorite craft store…and I do!

Do this:

Buy shatterproof ornaments only.  On sale.  (Hey, my tutorial, my rules.)

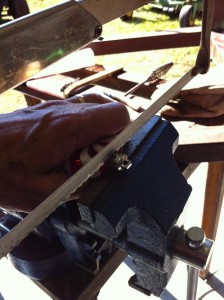
IMG_2030Use a hack saw (or another favorite saw of your choice) to remove the ornament-hook-holder-part from each small ornament.

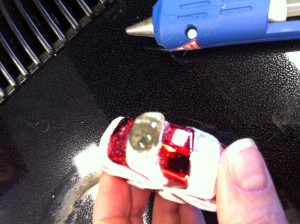
Same deal as last time, fire up the glue gun and apply the glue in a donut shape where the sawed-off part used to be.

Eyeball the ears (yup, just had to say that again) and, after waiting a few seconds for the glue to cool down a smidge, slap those ears on.IMG_2039


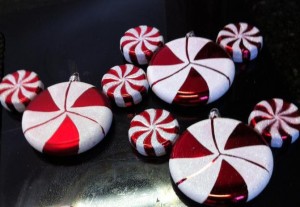
So, a teensy bit more difficult this time (what, with the sawing and all), but well worth the trouble.  Minty Mickey Mouse ornaments.  Made ’em myself.

IMG_2041